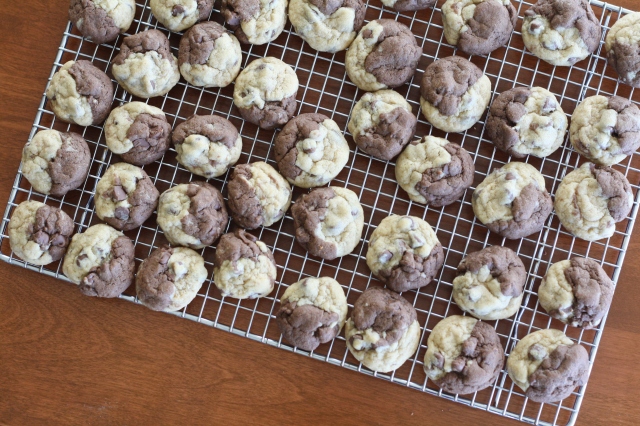
Black and White Chocolate Chip Cookies

IMG_4339

You get the best of both worlds with this cookie. My sister came up with the perfect way to eat it: take a bite of the light side, take a bite of the dark side, and then take a bite with both sides.

IMG_4328

IMG_4355

This is the easiest chocolate chip cookie recipe. There are a million different versions out there, but I have stuck to this one for years, and that’s because it’s the best. It’ll give you cookies that are crispy on the edges and soft and chewy in the center. And they’re not flat (I mean, who wants a flat, thin cookie?!) To make them black and white, I just split the completed dough in two different bowls and mixed in cocoa powder in one of the halves at the very end. So easy and they look so cool.

IMG_4323

IMG_4320

[Makes about three dozen cookies]
1 1/2 sticks butter, softened
1 cup brown sugar
3/4 cup granulated sugar
2 eggs
1 teaspoon vanilla extract
3 cups flour
3/4 teaspoon baking powder
3/4 teaspoon baking soda
1/2 teaspoon salt
2 cups chocolate chips
1/4 cup cocoa powder *optional

1. Preheat oven to 350 degrees F. Beat together softened butter and both sugars on medium until light and fluffy, about three minutes.
2. Beat in eggs, one at a time. Add vanilla.
3. Mix in flour, baking powder and soda, and salt until just incorporated. Fold in chocolate chips.
4. If making black and white cookies, place half of dough in another bowl and mix in 1/4 cup cocoa powder.
5. Scoop the dough into tablespoon-sized balls and place on greased cookie sheet. If making black and white cookies, take 1/2 tablespoon of light dough and 1/2 tablespoon of dark dough. Press together to make a single ball. Bake for 8-10 minutes. Cool on baking sheet and store in airtight container for several days.

Chocolate Beet Cake with Beet Cheese Cream Frosting

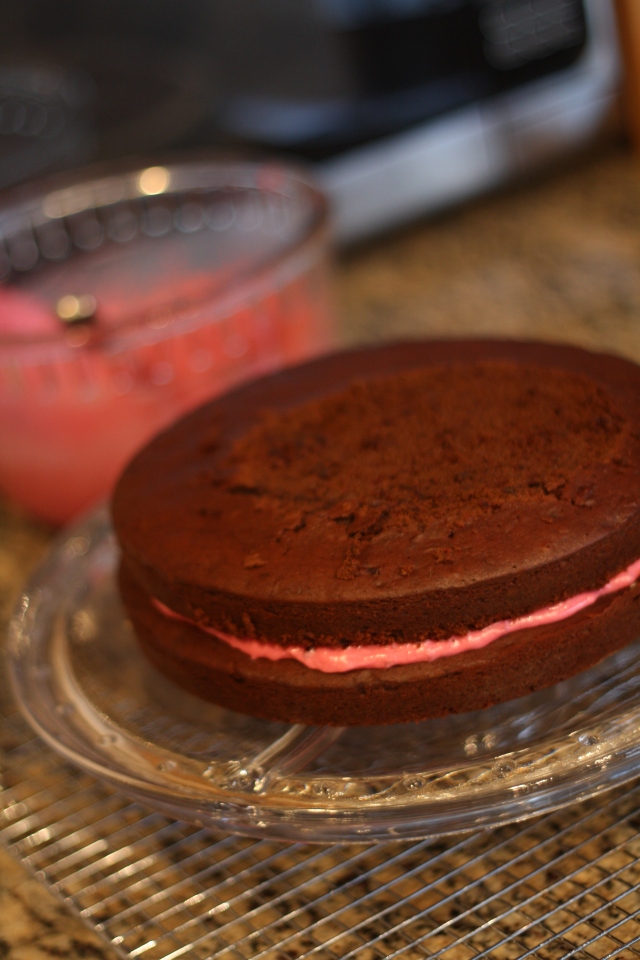
Yes, this cake has vegetables in it. No, it does not taste like vegetables. It tastes like the moistest (is that even a word?) cake you’ve ever eaten in your entire life and you will die of happiness. But hopefully not before you’ve saved the recipe.

IMG_4262

These beets WILL NOT MAKE THE CAKE TASTE LIKE BEETS (yes, that needed to be shouted.) The beets contribute to the cake by adding sweetness and making it super moist. They also make the frosting a purpley-pink color. That is all.

IMG_4279

I’ve been making my own birthday cake for a few years now, and each year I want to try something new and different and a little bit crazy. So that’s where the beets came in this past birthday.
IMG_4260

cake1 (2)

And you may need to get on your knees to frost it. Totally worth it.

So, if you’re feeling a little crazy, go roast a few beets and throw it in some cake batter. You’ll be wondering how you ever lived a life eating cake without vegetables in it.

Originally from Joy the Baker [makes two eight-inch layer cakes]
2 medium beets, unpeeled but trimmed of their greens
1 teaspoon vegetable oil
6 ounces unsalted butter, softened
1 cup brown sugar
3/4 cup granulated sugar
2 large eggs
1 teaspoon pure vanilla extract
2 cups all-purpose flour
2/3 cup unsweetened natural cocoa powder
1 teaspoon baking soda
1/2 teaspoon baking powder
1 teaspoon salt
1 1/4 cups buttermilk

Frosting:
1 cup unsalted butter, softened
8 ounces cream cheese, softened
3 cups powdered sugar, sifted
2 tablespoons finely grated beets, mashed with a fork
1 teaspoon pure vanilla extract or scrapings of one vanilla bean pod
1-2 teaspoons milk, depending on desired consistency
1/2 teaspoon fresh lemon juice
pinch of salt

1. Place a rack in the center and upper third of the oven. Preheat oven to 375 degrees F.
2. Thoroughly wash beets under running water, and trim their leaves, leaving about 1/2 inch of stem. Place clean beets in a piece of foil. Drizzle with just a bit of vegetable oil. Seal up foil. Place on a baking sheet in the oven. Roast until beets are tender when pierced with a knife, about 1 hour.
3. Remove the beets from the oven. Open the foil and allow beets to cool completely. Beets will be easy to peel (just using a paring knife) once completely cooled.
4. Using a box grater, grate the peeled beets on the finest grating plane. Measure 3/4 cup of grated beets for the cake and 2 tablespoons for the frosting. Set aside.
5. Reduce the oven temperature to 350 degrees F. Use butter to grease two 8 or 9-inch round baking pans. Trace a piece of parchment paper so it is the same size as the bottom of the cake pan. Cut it out and place inside the cake pan. Butter the parchment paper. Add a dusting of flour to coat the pan. Set pans aside while you prepare the cake.
6. In the bowl of an electric stand mixer, fitted with a paddle attachment, cream together butter and sugars. Beat on medium speed until pale and fluffy, about 3 to 5 minutes. Beat in eggs, one at a time, for one minute after each addition. Stop the mixer and scrape down the sides of the bowl as necessary. Once eggs are incorporated, beat in beets and vanilla extract until thoroughly combined.
7. In a medium bowl, whisk together flour, cocoa powder, baking soda, baking powder, and salt.
8. Add half of the dry ingredients to the butter and egg mixture. Beating on low speed , slowly add the buttermilk. Once just incorporated, add the other half of the dry ingredients. Beat on medium speed until milk and dry ingredients are just incorporated. Try not to overmix the batter. Bowl can be removed from the mixer and mixture folded with a spatula to finish incorporating ingredients. Cake batter will be on the thick side… not pourable.
9. Divide the batter between the two prepared cake pans. Bake for 23 to 25 minutes (for a 9-inch pan) or 30-32 minutes (for an 8-inch pan). Cake is done when a skewer inserted in the center comes out clean. Remove cakes from the oven and allow to rest for 10 minutes. Invert cakes onto a cooling rack to cool completely before frosting and assembling the cake.

To make the Frosting:
1. In the bowl of an electric stand mixer, fitted with a paddle attachment, beat cream cheese for 30 seconds, until pliable and smooth. Add the butter and beat for another 30 seconds, until well combined. Stop the mixer and scrape down the bowl as necessary. Beat in the beets. Add the powdered sugar, vanilla extract, milk, lemon juice, and salt. Beat on medium speed until smooth and silky. Refrigerate the frosting for 30 minutes before frosting the cooled cakes.
2. To assemble the cake, place one layer of cake on a cake stand or cake plate. Top with a generous amount of pink frosting. Spread evenly. Place the other cake on top of the frosting. Top with frosting. Work frosting onto the sides of the cake. You will have extra frosting left over. Refrigerate for an hour before serving (it will make the cake easier to slice). Cake will last, well wrapped in the refrigerator, for up to 4 days.
Banana Oat Energy Cookies

IMG_3546

IMG_3554

IMG_3558
Let’s give it up for being home from college and having a full pantry loaded with spices and ingredients. And also for only knocking down the stack of cookies twice before I snapped a picture.

IMG_3557These cookies are healthier than most (no butter, flour, or sugar!) And, they can actually be made into banana oat energy bars by pressing them and baking in an 8×8 pan. And on top of being healthy, this is a perfect way to use up ripe bananas.

Originally from Sally’s Baking Addiction [makes about 20 cookies]
*This recipe is easily adaptable. You can cut the honey/syrup out if you want it less sweet, swap chocolate chips for coconut, or add nuts and seeds. I used peanut butter instead of almond butter, cut the amount of honey in half, and added a few teaspoons of both chia seeds and hemp hearts.

2 and 1/3 cups quick oats
3/4 teaspoon salt
1 teaspoon ground cinnamon
1 cup almond butter
1/4 cup pure maple syrup or honey
2 large ripe bananas, mashed (about 1 cup)
1/3 cup dark or semi-sweet chocolate chips

1. Preheat oven to 325F degrees. Grease or line large cookie sheet with parchment paper or a silicone baking mat. Set aside.
2. Combine all of the ingredients into a large bowl. Using a large rubber spatula or wooden spoon, mix until all of the ingredients are thoroughly combined. The dough will be sticky and thick.
IMG_35403. Each cookie will be 1.5 Tablespoons of dough. Drop this amount onto prepared cookie sheet and slightly flatten the tops into desired thickness. The cookies will not spread in the oven.
IMG_35414. Bake for 15 minutes until edges are very slightly brown. Don’t bake any longer or the cookies will taste dry. Allow to cool on the cookie sheets completely. Cookies stay fresh at room temperature for 1 week. Cookies can be frozen up to 3 months.

Lemon Cookies

Another guest post by the infamous twin sister (see her Black Bean Burgers below.) And the first dessert post on this website, which is crazy, because baking desserts is my favorite thing to do. I present to you: LEMON COOKIES!

These lemons cookies are so, so, so good. I’m definitely a chocolate lover, but these cookies don’t make me miss chocolate chips. These cookies have a shortbread quality to them, and when paired with the fresh lemon flavor, they are the perfect dessert.
Lemon-Crinkles2-jpg
                                                          Photo from original recipe, Mel’s Kitchen Cafe

Recipe from Mel’s Kitchen Cafe [makes 2-3 dozen]
1/2 cup (8 tablespoons) butter, softened
1 cup granulated sugar
1/2 teaspoon vanilla extract
1 large egg
1 teaspoon freshly grated lemon zest
1 tablespoon freshly squeezed lemon juice, from about 1/2 lemon
1/4 teaspoon salt
1/4 teaspoon baking powder
1/8 teaspoon baking soda
1 1/2 cups all-purpose flour
1/2 cup powdered sugar

1. Preheat oven to 350 degrees. Line rimmed baking sheets with silpat liners, parchment, or lightly coat with cooking spray.
2. In a large bowl, cream butter and sugar together until light and fluffy. Add vanilla, egg, lemon zest and juice and mix well, scraping down the sides as needed. Add the dry ingredients (except the powdered sugar) and mix until just combined. Place the powdered sugar on a large plate or shallow pie dish. Roll tablespoon-size balls of dough in the powdered sugar to coat. Place on the prepared baking sheets, about 2 inches apart.
3. Bake the cookies for 9-11 minutes. The cookies will not be browned on the edges but they will have lost a bit of their shininess on top. Don’t overbake! Cool the cookies on a cooling rack and store in an airtight container or eat immediately.