Baked Eggs with Spinach and Mushrooms

IMG_4553
Disclaimer: this dish is ten times more delicious than it looks. I blame the unnatural lighting.

Last week my roommate was pan-frying mushrooms with olive oil and thyme.  This resulted in 1.) me lingering around the kitchen just to savor the smell and 2.) the realization that I never, ever use mushrooms to cook.  Fast-forward a few days and here I am, with a carton of mushrooms taking up the precious fridge space.  So proud.

I am awful at describing what things taste like because I just say it’s all just good and that’s the only thing that matters.  But, this was extra special.  Because it’s so healthy and wholesome, but has such a deep taste.  I am now deeply converted to mushrooms.

IMG_4556

So, go pull your cast-iron skillet pan out and feel fancy making baked eggs with mushroom and spinach for brunch.

Baked Eggs with Spinach and Mushrooms

From Smitten Kitchen // makes 12 portions

2 pounds (32 ounces) ounces fresh baby spinach or regular spinach leaves
1 small yellow onion, finely chopped
3 small garlic cloves, minced
4 tablespoons unsalted butter
1 pound mushrooms, thinly sliced
1 cup heavy cream
3/4 teaspoon table salt
Freshly ground black pepper
1/4 teaspoon freshly grated nutmeg (optional)
12 large eggs
6 tablespoons finely grated Parmesan cheese

1. Bring 1/2 inch water to a boil in a very large ovenproof heavy skillet, then add half of spinach and cook, turning with tongs, until wilted, about 30 seconds. Add remaining spinach and wilt in same manner, then cook, covered, over moderately high heat until spinach is tender, about 1 to 2 minutes. Drain in a colander and cool under cold running water. Gently squeeze handfuls of spinach to remove as much liquid as possible, then coarsely chop. You will have about 2 cups fairly tightly packed cooked spinach.

2. Wipe skillet dry, then melt butter over medium-low heat. Cook onion and garlic until softened, 2 to 3 minutes. Add mushrooms and increase heat to medium-high, then cook, stirring, until mushrooms have softened, exuded liquid and that liquid has cooked off, about 5 minutes. Stir in cream, salt, pepper, nutmeg (if using), and chopped spinach and bring back a simmer. Remove skillet from heat.

3. If baking eggs in this skillet, make 12 large indentations in mixture, each large enough to fit an egg. Otherwise, you can transfer this mixture to a 9×13-inch baking dish and do the same there.

4. When you’re ready to bake the dish, or about 30 minutes before serving, put oven rack in upper third of oven and heat oven to 450°F. Crack an egg into each well. Bake until whites are firm and yolks are still runny. You can check this by inserting a toothpick into various parts of the eggs and seeing whether they’re runny or set, which takes anywhere from 15 to 30 minutes. The range is long due to different ovens and baking vessels. It’s better to have to check more often than to let them overcook.

Egg Salad Sandwich

IMG_3419

IMG_3420

IMG_3421                                                                   On homemade honey wheat bread!

I don’t know why I love egg salad sandwiches so much, but I do. And I loved them even more after I found out how easy they are to make. These are creamy and have great flavor from the chopped dill and ground pepper!

Originally from Mel’s Kitchen Cafe [makes about 5 sandwiches]
10 hard-boiled eggs, peeled
1/4 cup light or regular mayonnaise
1/4 cup nonfat plain Greek yogurt
2 teaspoons finely chopped fresh dill, plus more to taste, if needed
Squeeze of fresh lemon juice (1/2 teaspoon or so)
Salt and pepper to taste
10 slices hearty whole-grain bread

1. Cut the eggs into quarters and place in a medium bowl. Add the mayo, yogurt, dill, and lemon.
2. Using a fork, combine and lightly mash the mixture until the ingredients are mixed and the eggs are the desired size. I prefer my egg salad with pretty good texture – so I try to keep the stirring/mashing to a minimum.
3. Add salt and pepper to taste and lightly combine.
4. Refrigerate, covered, until ready to serve on sandwiches.

Black Bean Burgers

Introducing: GUEST POST BY MY TWIN SISTER (!!!) Don’t know why I need to introduce her because she’s the only one who visits my little website. But nonetheless, here she is with her recipes that my taste buds applaud.

Hello everyone! I’m Anna, Erin’s twin sister and fellow kitchen-experimenter. Today I’m guest blogging to share two of my new and favorite recipes, a perfect dinner-dessert combo: black bean burgers and lemon cookies. (Lemon cookies on the next post!)


bean        bean1

A couple months ago I tasted “fake” meat for the first time. I couldn’t wrap my head around the fact that the “chicken patty” had no chicken in it. The lack of an ingredient list also left me dubious, as I had no idea as to whether to patty was filled with chemicals or not.

When I saw this recipe from Eating Whole, I knew I had to try my hand at a vegetarian “burger”. I made this out of pure curiosity, and was pleasantly surprised when it came out to by flavorful. It evolved from a one-time-try to a fun meal to make once in a while. Although it tastes nothing like a real burger, this may be a nice substitute for those who are too nervous to deal with red meat in the kitchen.

From Eating Whole [makes six patties]
1/6 of an onion, chopped
1/2 of a celery stalk, chopped
1 medium carrot, chopped
3 minced garlic cloves
dash of each: cumin/paprika/salt/pepper
1 can of black beans, drained
1/2 of a steamed sweet potato
1 egg
¼ cup corn

1. Sauté the onion, celery, carrot and garlic until they begin to soften.
2. In a bowl, mash the steamed sweet potato and black beans into a chunky paste. Add the egg, corn, spices and sautéed ingredients until and mix with for until well combined. The result should still be chunky, not a paste.
3. Form into 6 patties, and then cook in a skillet for 2-4 minutes on each side.


Roasted Broccoli Grilled Cheese

Roasted-Broccoli-Grilled-Cheese-9//This is not my own photo (obviously) because I may or may not have burnt mine both times I made it. But in my defense, I like my food well-done. Photo from recipe source, Two Peas and Their Pod.)//

Sometimes you just need to eat a grilled cheese sandwich. And sometimes you can add roasted broccoli to that sandwich to not only make yourself feel healthier, but to also transform it into the tastiest grilled cheese you have ever had. You can’t go wrong with the classic broccoli and cheese combo. Anna, you MUST try this.

from Two Peas and Their Pod
Makes 3-4 sanwiches
Florets from 1 medium head broccoli (about 1/2 pound), chopped small
2 tablespoons olive oil
1/2 teaspoon salt
1/4 teaspoon freshly cracked black pepper
Unsalted butter, softened
6 to 8 slices bread
1 cup cheddar cheese, shredded or thinly sliced

1. Preheat the oven to 400 degrees F.
2. On a sheet pan, mix the broccoli, oil, salt, and pepper. Roast for 8 to 10 minutes, or until the broccoli is evenly roasted but not burnt. Remove from the oven and allow to cool.
3. Heat a skillet over medium-low heat.
4. Spread butter evenly on one side of each slice of bread. Dividing the ingredients evenly, layer cheese on the unbuttered side of half of the bread slices, then add chopped broccoli in the middle and more cheese on top so that the broccoli lies between two layers of cheese. This keeps the small pieces of broccoli from falling out as the cheese melts. Top each with another slice of bread, butter side out.
5. “Grill” in the skillet, turning sandwiches over once, until the cheese melts and the bread is evenly toasted.

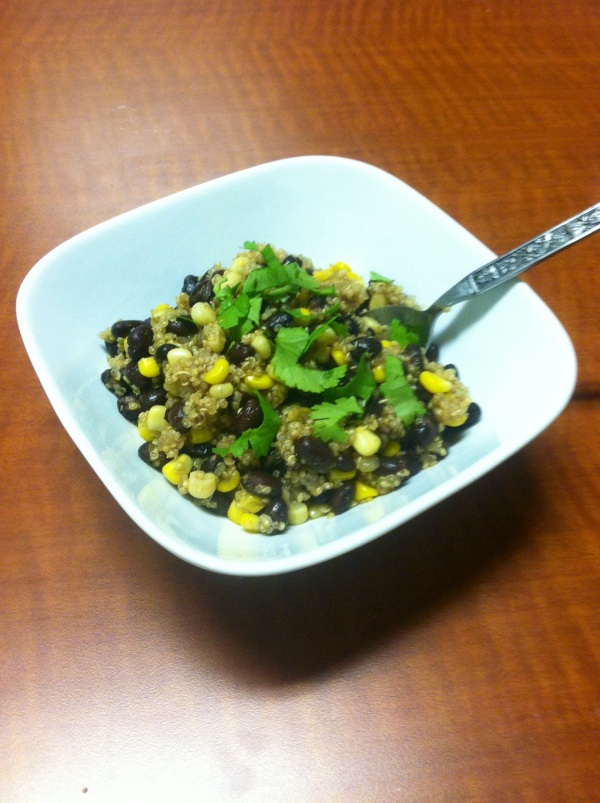
Black Bean and Sweet Corn Quiona Salad

aaad

//I apologize for this semi-blurry and completely awful iPhone photo.//

A light, quick, easy, and delicious lunch. I love using quinoa seeds because they’re tiny little puffs of healthiness.

From Mel’s Kitchen Café (go there to see a much more pleasing photo)

1 tablespoon olive oil
1 medium yellow onion, chopped
2 cloves garlic, minced
3/4 cup uncooked quinoa
1 1/2 cups chicken or vegetable broth
1 teaspoon ground cumin
1/4 teaspoon cayenne pepper (*I omitted this)
1/2 teaspoon salt
1/2 teaspoon freshly ground black pepper
1 cup frozen sweet white corn
2 (15-ounce) cans black beans, drained and rinsed
1/2 cup cilantro, chopped

1.In a medium pot, heat the olive oil over medium heat. When shimmering and hot, add the onions and saute for 4-5 minutes, stirring often. Add the garlic and stir for a minute or two until the garlic is fragrant, being careful not to burn the garlic.
2.Add the quinoa and cover with broth. Stir in cumin, cayenne pepper, salt and pepper. Bring the mixture to a boil. Cover, reduce heat and let simmer for 20 minutes (or until all the liquid is absorbed).
3.Stir in the frozen corn and black beans. Cover and let the pot sit off the heat until the corn and beans are heated through, about 5-6 minutes. Stir in the cilantro. Serve warm or chilled.

Pizza: Asparagus and Thai

About those tortillas. They are the perfect crispy, thin pizza crusts.  And–instead of having to make dough, wait for it to rise, and roll it out– you can pull out a leftover tortilla and throw together the perfect lunch super fast! 

The number of different pizzas you could make are endless.  Like, seriously, you could live to be 100 and still be whipping out new combinations of flavors and ingredients.  But I’m going to talk about two different options:  shaved asparagus pizza, and thai peanut pizza (AND THEY’RE ALL SUPER EASY, KAYLA, SO YOU BETTER MAKE THESE)

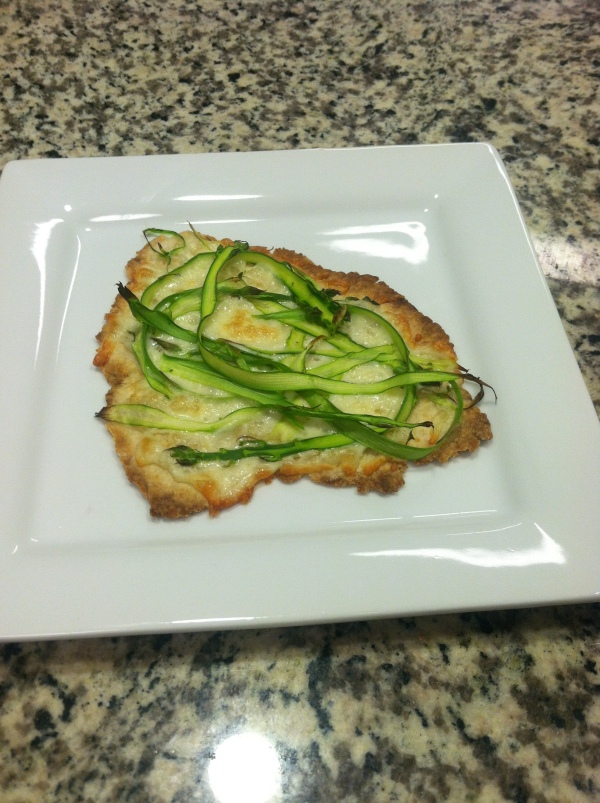
1) SHAVED ASPARAGUS PIZZA (aka the best thing ever)
aspa
When I think of this pizza, I think of one word: fresh. Pizza carries a negative connotation (I mean, come one, it’s on pretty much every temptation challenge on the Biggest Loser). But this is the opposite of a large slab of dough bogged down with grease. It’s fresh. This is a pizza you eat when you want to feel healthy. And clean. And good. So, basically, you should eat this all the time.

from Smitten Kitchen *this is for a full size pizza… reduce the amounts if you’re just making a single serving on a tortilla
1/2 pound asparagus
1/4 cup grated Parmesan
1/2 pound mozzarella, shredded or cut into small cubes
2 teaspoons olive oil
1/2 teaspoon coarse salt
Several grinds black pepper
1 scallion, thinly sliced

1. Preheat your oven to the hottest temperature it goes, or about 500 in most cases. If you use a pizza stone, have it in there.
2. Prepare asparagus: No need to snap off ends; they can be your “handles” as you peel the asparagus. Holding a single asparagus spear by its tough end, lay it flat on a cutting board and using a peeler, create long shavings of asparagus by drawing the peeler from the base to the top of the stalk. Repeat with remaining stalks. Toss peelings with olive oil, salt and pepper in a bowl.
3. Assemble and bake pizza: Pile asparagus on top of pizza dough (or tortilla). Bake pizza for 10 to 15 minutes, or until edges are browned, the cheese is bubbly and the asparagus might be lightly charred. Remove from the oven and immediately sprinkle with scallions, then slice and eat.

2) THAI PIZZA
I don’t have a recipe for this, I just made it up. It’ll make you feel like you’re travelling the world, even when you’re in Heritage Halls building 29.
thai

 
//Let us all pretend that there is not a plastic bag sticking out in this picture.//

Thai peanut sauce
mozzarella cheese
chicken, cooked and cut into bite-size pieces
bell peppers, cut into bite-size pieces
broccoli, cut into bite-size pieces

1.Spread Thai peanut sauce on your tortilla, or dough. Add mozzarella cheese, chicken, bell peppers, and broccoli.
2. Bake at 450 degrees for 10-12 minutes, or until cheese is melted and bubbly.